SEARCH
Oct 162018

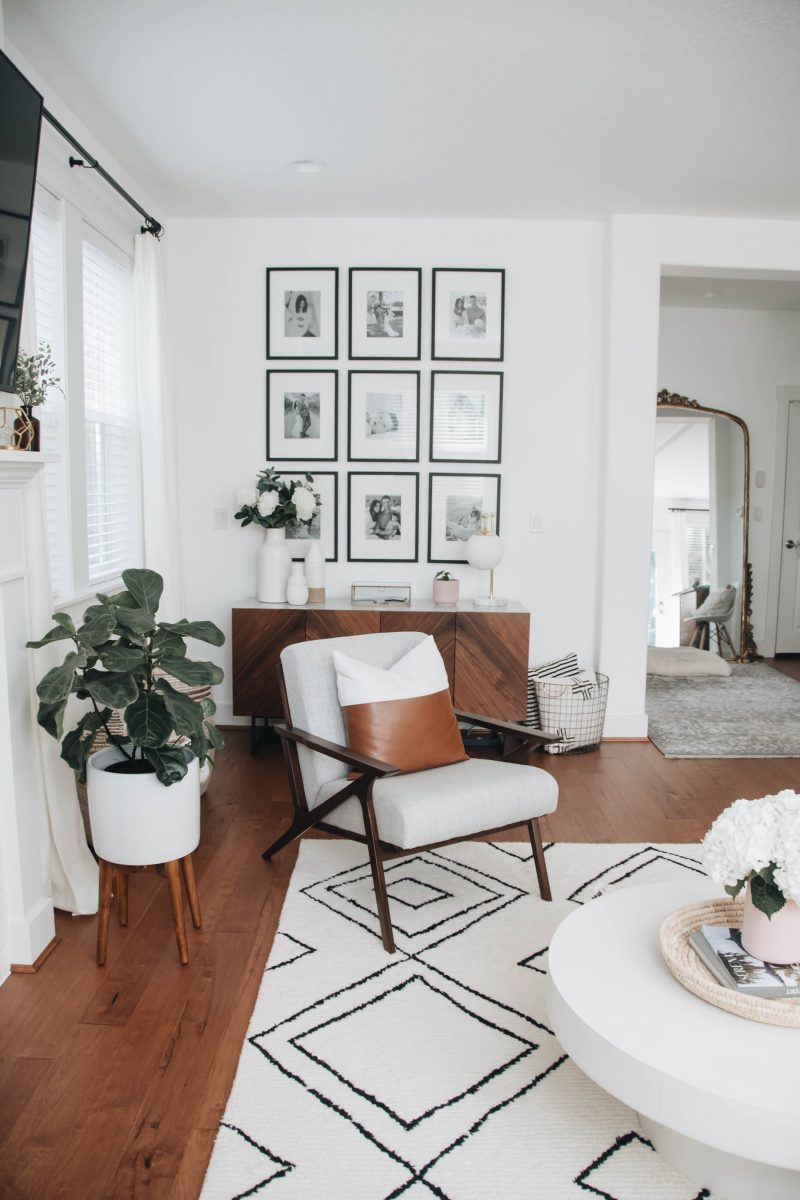
Even before knowing if we got the house, I knew I wanted to create a gallery wall with family photos on this wall. It was a vision that came to my mind the second I walked into the house. Before this house, we never really had family photos framed and put on the wall. All the places we lived prior to this never really fit our style and we didn’t want to invest in too many changes since we were renting (wasn’t going to paint, etc.). So, this little wall that gets so much love on Instagram has been something I’ve been dreaming up for years and after picking out the frames, it came together fairly easily.

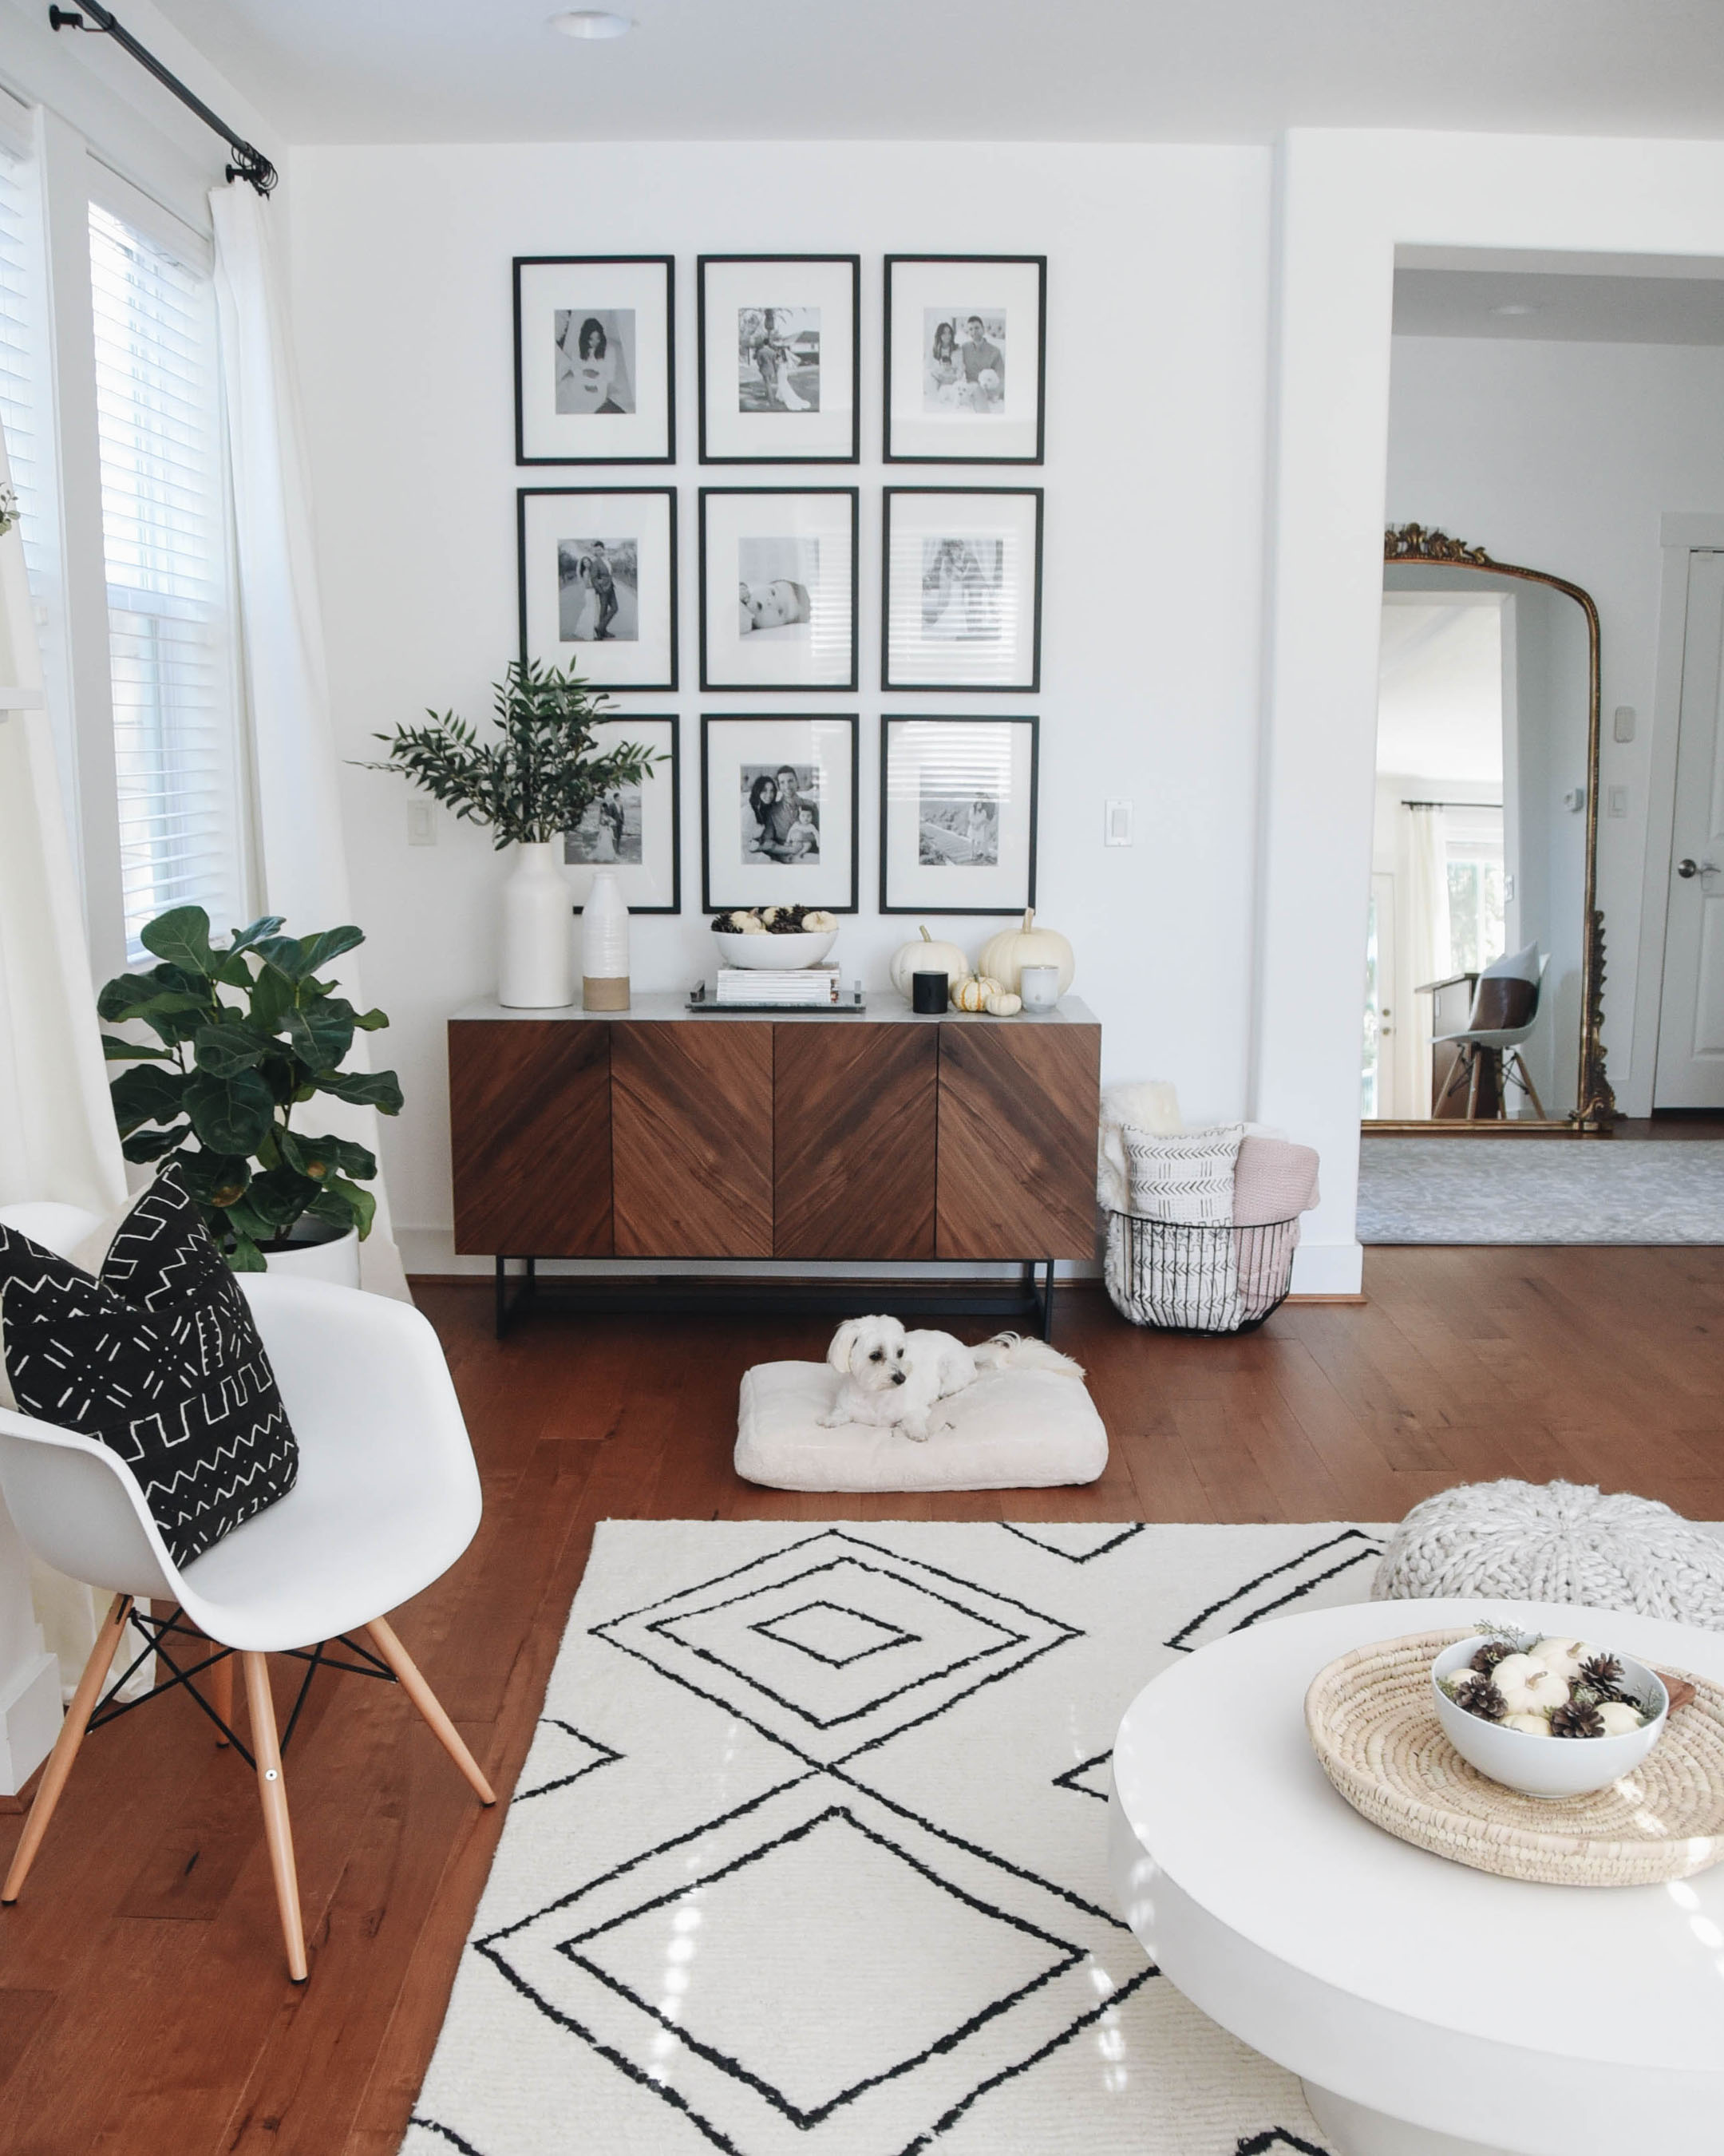
Exact Frames: Single Image Matted Frame – Made By Design. Holds an 8×10 picture. Frame size 19×15 inches.
Initially, I wanted to partner with a beloved frame company that I’ve admired for a while. Unfortunately, they only wanted to gift us frames that they were promoting at the time, which didn’t fit the vibe we were going for. It took me a while to settle on frames, but once we got these Target frames in, I knew they would be perfect. The matte black, straight-edge frames work perfectly with the rest of the living room and I love how bold the black and white look together. To be honest, we were a little hesitant to go with black frames initially because of how bold of a statement it would make, but there’s so much white surrounding them, it makes the black not so overwhelming.
Process
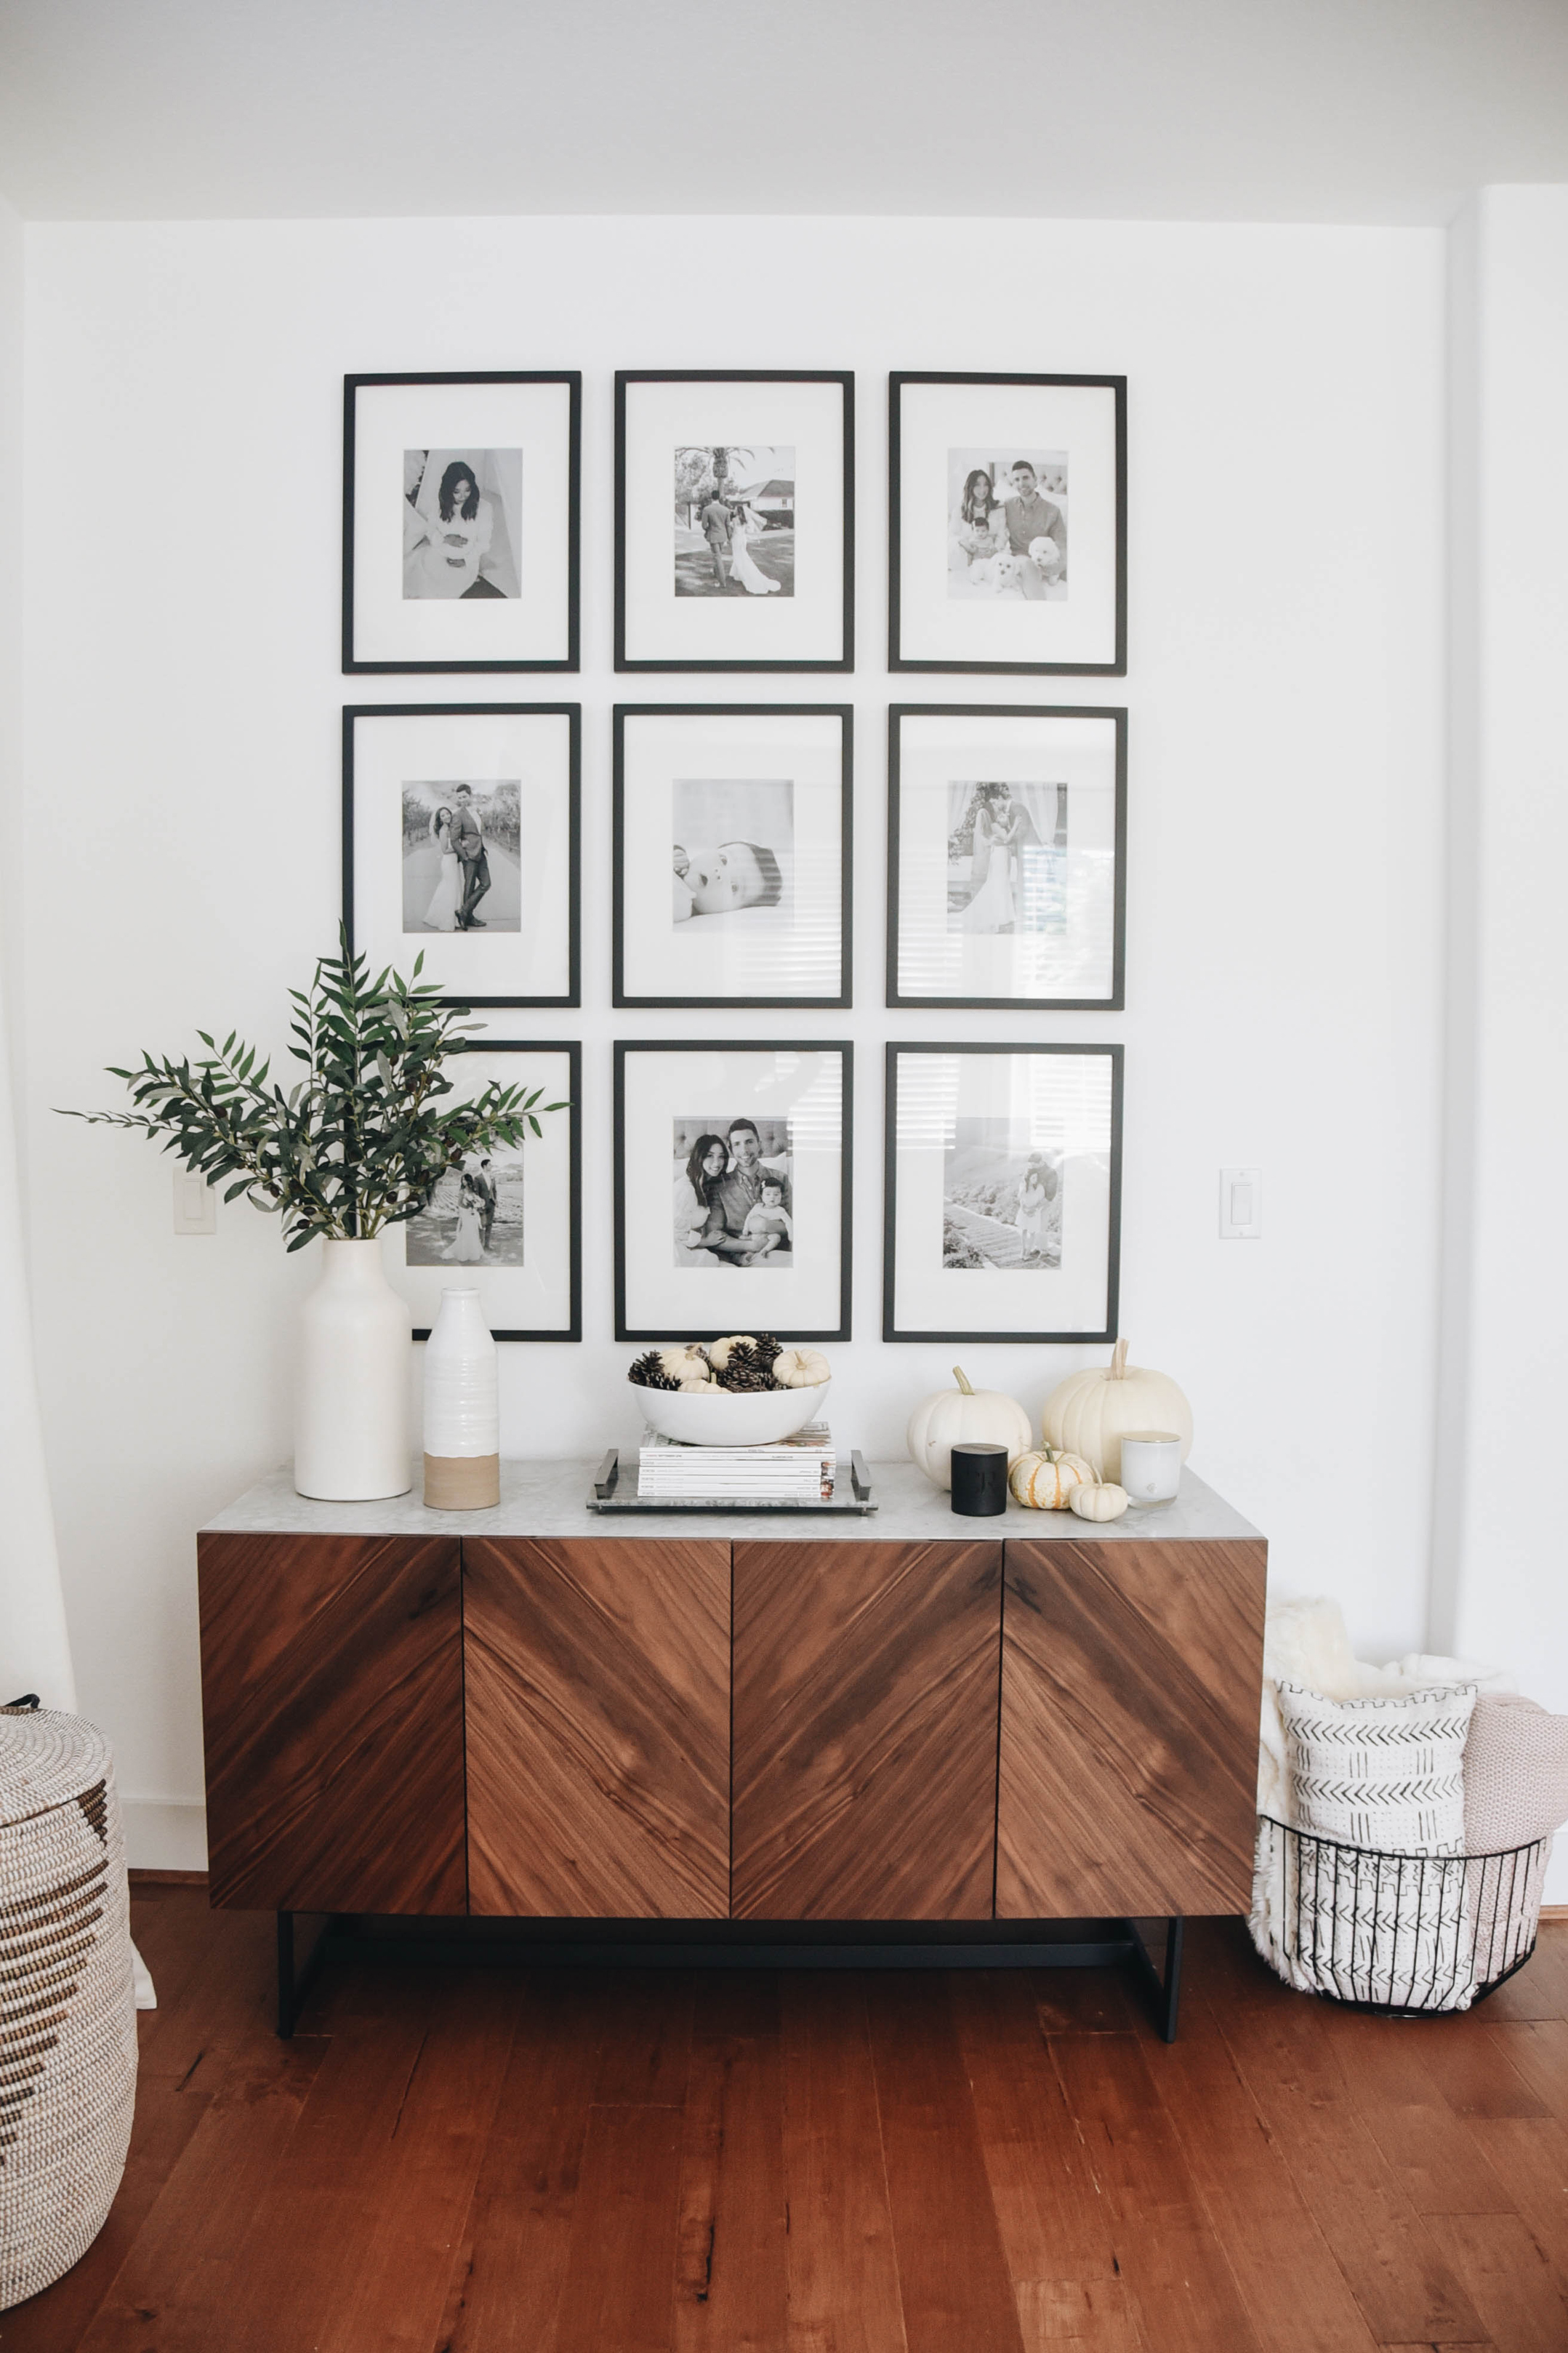
We didn’t pick out frames or take measurements until we got our console table in place. Once we had it, we measured the space between the console and ceiling. We divided that by 3 to get a rough estimate on the size of frames that would work best in the space. We visualized the spacing for several days before deciding on the size of the frames. I had Mike hold books and magazines up at the right heights to gauge sizing reference (because I’m crazy). I started browsing the Internet for frames and was quite disappointed with the selection. I was only able to find the right frame style in the right size at a couple places, Target being one of them.
We printed out 8×10 black and white photos from Mpix.com (recommended by Liz). Once the photos were framed we started to play with the layout. I’m such a visually symmetrical kind of person, so I wanted the photos to balance out on the wall (close ups versus farther shots). Once we got the layout of the photos taken care of we started measuring out the frames on the floor. I knew I wanted more space above the gallery wall (ceiling) than at the bottom of it (console), so we played with the frames until we got a good layout. We ended up having 2” between each photo. Once everything was finalized on the floor, Mike began to put up each frame. He started with the center frame and then finished the center column first. Since the frames came with sawtooth backings, Mike used nails to hang the frames (we normally would do frame hanging wire).
Frames
The frames were very inexpensive, so I wasn’t expecting to be wowed when they arrived. They were exactly what I was looking for, but some of the frames arrived with marks and even some small chips. Instead of dealing with returns and exchanges, I thought I would go with it. Nothing was overly noticeable and they would be on the wall, so I knew people wouldn’t be holding the frames examining them. The biggest downside to the frames, the sawtooth backings on the back were not symmetrical. This meant that even though our measurements we’re precise, the frames would be slightly off when we hung them up. Talk about frustrating. It’s not like putting up a gallery wall is easy, right? Mike was a little frustrated at first with this minor detail, but he was able to tweak things and the rest of the frames went up seamlessly. If the frame was not straight, he ended up placing a small nail near the main nail to tweak the frame a little bit. I think he only did this on 3 frames.
Tips
I LOVE the way this gallery wall turned out! If you’re handy (or someone who is helping you is) I would recommend these Target frames. They’re super budget-friendly and the style is timeless. If you don’t want to deal with frames that don’t have symmetrical backings, you may want to go with a more expensive frame like these from Pottery Barn, which were also an option for us.
SHOP THE POST